Year 4 MBChB — Internal Medicine clinical skills. Learn the sequence, what each step tests, and how to report normal and abnormal findings.
1. The sequence: IPPA
For the respiratory system, use:
I — Inspection → P — Palpation → P — Percussion → A — Auscultation.
This is different from the abdomen, where auscultation is generally performed before percussion and palpation. The reason is that manipulating the abdomen can alter bowel sounds; chest examination has no equivalent reason to delay palpation or percussion.
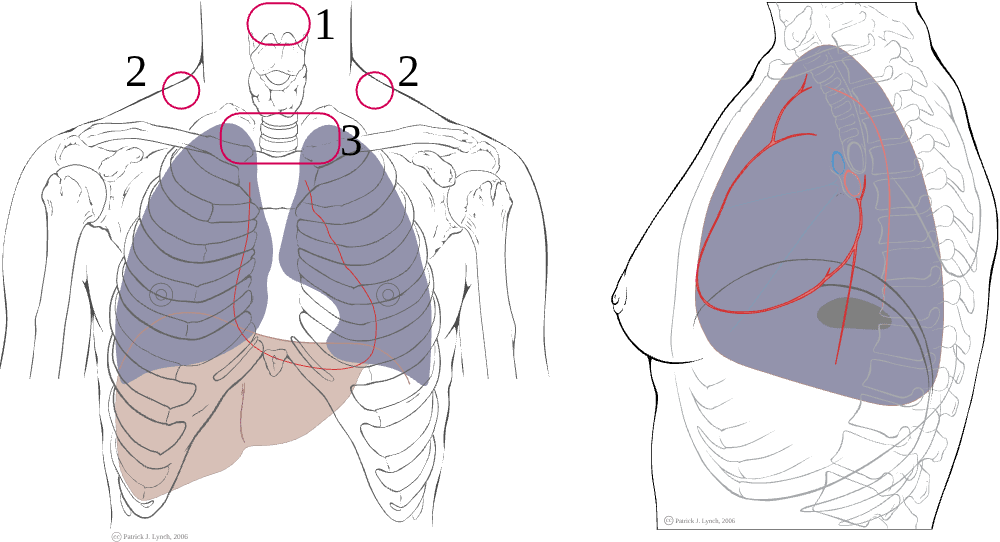
Illustration of the IPPA sequence. Source: K2 International chest assessment. Use it alongside the steps below.
Before starting: introduce yourself, confirm the patient, explain and obtain consent, wash hands, ask about pain, position the patient comfortably, expose the chest appropriately, and compare both sides. Examine the front, sides and back—not just the front of the chest.
2. Inspection — what can you see?
Stand back first and look at the patient generally.
General inspection
- Respiratory distress: inability to speak full sentences, accessory muscle use, nasal flaring, sweating, agitation or drowsiness.
- Respiratory rate and pattern. A typical resting adult rate is about 12–20 breaths/minute; interpret values in context.
- Oxygen delivery devices, inhalers, sputum containers or other relevant equipment.
- Cyanosis, pallor, cachexia or other signs of chronic disease.
Inspect the chest
- Shape: normal, barrel-shaped chest, pectus excavatum/carinatum, kyphosis or scoliosis.
- Symmetry: does both sides rise equally?
- Movement: reduced movement on one side can occur with pleural effusion, pneumothorax, collapse or pain.
- Scars, drains, deformities, masses and use of accessory muscles.
- Tracheal position is assessed mainly by palpation, but obvious deviation may be visible.
What is the point? Inspection gives clues before you touch the patient. Severe distress, cyanosis or exhaustion is a priority: assess ABCs, oxygen saturation and urgent help before completing a routine examination.
3. Palpation — what do you feel?
A. Tracheal position
Use fingertips at the suprasternal notch to assess whether the trachea is central. A deviated trachea is a clue, not a diagnosis. Large pleural effusions or tension pneumothorax can push it away; major volume loss such as lung collapse can pull it toward the affected side. A suspected tension pneumothorax is a clinical emergency—do not delay urgent treatment for a full examination or imaging.
B. Chest expansion
Place your hands symmetrically on the lower posterior chest, thumbs near the midline, and ask the patient to take a deep breath. Watch and feel whether both thumbs move apart equally. Reduced unilateral expansion may occur with effusion, pneumothorax, consolidation or collapse; bilateral reduction may occur in obstructive or restrictive disease.
C. Tactile vocal fremitus
Place the ulnar edge or palm of your hands symmetrically on the chest and ask the patient to repeat “ninety-nine” or a similar phrase. Compare vibration side-to-side.
- Increased over an area can occur in consolidation because dense lung transmits voice vibration better.
- Reduced over pleural fluid or air, or with obstructed bronchus/collapse, because transmission is reduced.
Technique and the patient's voice affect this finding; interpret with percussion and auscultation.
4. Percussion — why do we tap the chest?
Percussion creates a sound that gives clues about the tissue beneath the chest wall. Compare matching areas on the left and right, moving systematically from the upper chest downward. Avoid tapping directly on the scapula or breast tissue where possible.
- Resonant: expected over normally aerated lung.
- Dull: suggests denser tissue or fluid, as in consolidation or pleural effusion.
- Stony dull: classically associated with pleural effusion.
- Hyper-resonant: may occur with excess air, such as pneumothorax or emphysema.
Percussion alone cannot diagnose the condition. Combine it with chest expansion, vocal fremitus, breath sounds, vital signs and investigations.
Classic patterns to remember
| Finding | Consolidation (e.g., pneumonia) | Pleural effusion | Pneumothorax |
|---|---|---|---|
| Expansion | Reduced on affected side | Reduced on affected side | Reduced on affected side |
| Percussion | Dull | Stony dull | Hyper-resonant |
| Breath sounds | Often bronchial over consolidation | Reduced/absent over fluid | Reduced/absent over air |
| Vocal fremitus | Often increased over consolidated lung | Reduced over fluid | Reduced over pleural air |
| Other clues | Bronchial breathing, crackles, increased vocal resonance | Possible reduced vocal resonance | Acute pleuritic pain/dyspnoea; assess urgently if unstable |
These are classic patterns; real patients may not show every feature.
5. Auscultation — what do I listen for?
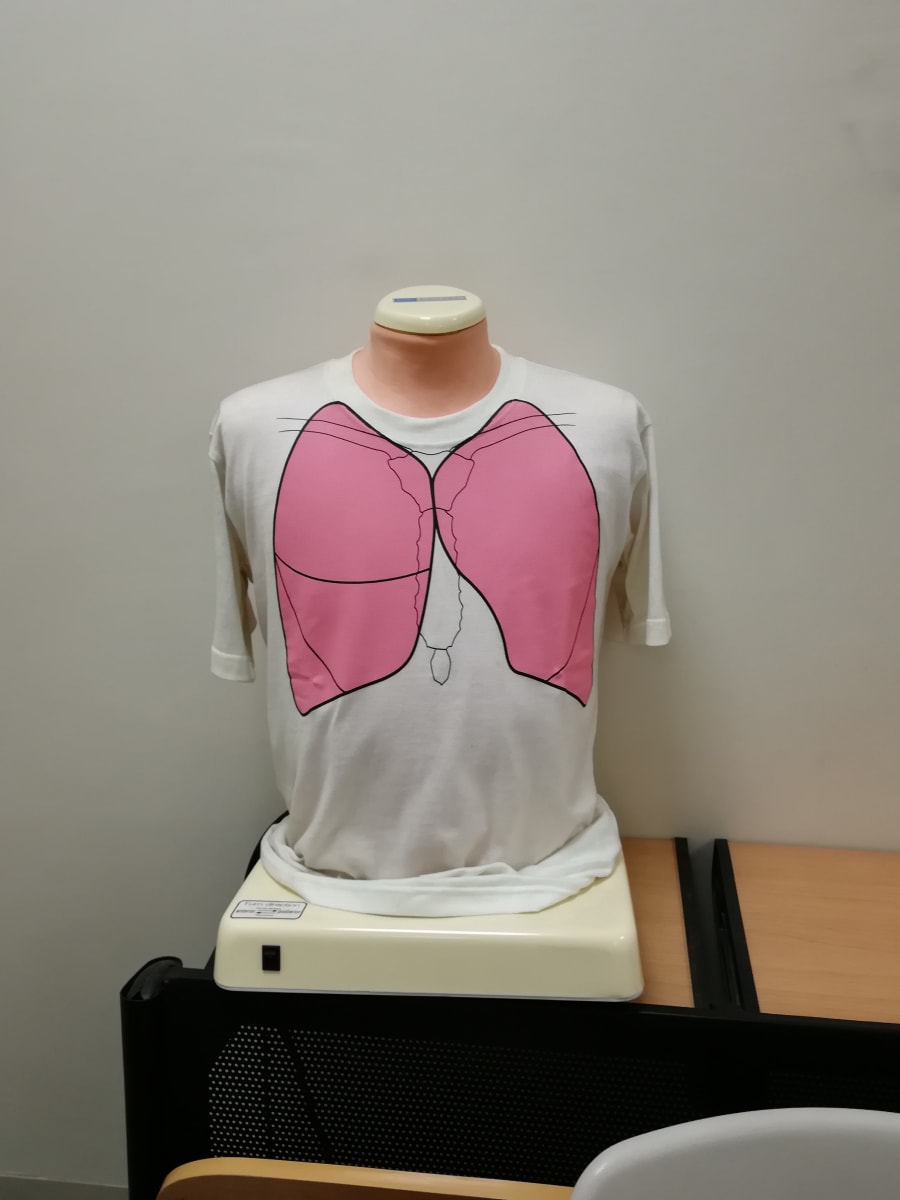
Ask the patient to breathe slowly and deeply through an open mouth. Use the diaphragm of the stethoscope directly on the skin. Listen to a full in-and-out breath at each location and compare equivalent areas side-to-side. Listen over the anterior, lateral and posterior chest, including the lung bases.
At every point ask:
- Is air entry present and equal?
- What is the breath-sound quality?
- Are there added sounds—crackles, wheeze, stridor or a pleural rub?
- If voice transmission is abnormal, does it support consolidation, effusion or another process?
Normal breath sounds
- Vesicular: soft, low-pitched breath sounds over most peripheral lung fields; inspiration is usually longer/louder than expiration, with no gap.
- Bronchial: louder, higher-pitched, tubular sound with a distinct expiratory phase and possible pause; normally heard over the trachea/large central airways. If heard over peripheral lung, think consolidation or another abnormal transmission pattern.
- Absent/reduced breath sounds: may occur with pleural effusion, pneumothorax, severe airflow obstruction, collapse or shallow breathing. Check technique and compare sides.
Added sounds
- Crackles (crepitations): brief popping sounds, often more prominent on inspiration. Fine crackles may occur in pulmonary oedema or interstitial disease; coarse crackles may occur with secretions, bronchiectasis or pneumonia. Context matters.
- Wheeze: musical sound, usually expiratory, due to narrowed airways (e.g., asthma/COPD). A very quiet chest in a severely breathless patient can be more dangerous than a loud wheeze.
- Stridor: harsh, usually inspiratory sound from upper airway narrowing. Treat as potentially urgent, particularly with distress.
- Pleural friction rub: rough, grating sound caused by inflamed pleural surfaces rubbing.
- Rhonchi: low-pitched, snoring/gurgling sounds associated with secretions in larger airways; may change after coughing.
6. Voice transmission tests
Use these when clinically indicated, particularly if you suspect consolidation or pleural disease.
- Vocal resonance: listen over the chest while the patient repeats “ninety-nine.” It is increased over consolidation and reduced over pleural fluid or air.
- Bronchophony: spoken words become unusually clear through the stethoscope; supports consolidation.
- Whispering pectoriloquy: whispered words are unusually distinct; can support consolidation.
- Egophony: the spoken “ee” may sound like “ay” over an area of consolidation or at the upper border of an effusion.
These are supporting signs—not stand-alone diagnoses.
7. How to present respiratory findings
Normal example:
“On respiratory examination, the chest is symmetrical with equal expansion. The trachea is central. Percussion is resonant bilaterally, and vesicular breath sounds are heard with equal air entry. There are no added sounds.”
Possible right lower-lobe consolidation:
“There is reduced expansion at the right base, dull percussion, bronchial breath sounds and increased vocal resonance in the same area, with inspiratory crackles. The findings are suggestive of consolidation; I would correlate with the history, vital signs and chest imaging.”
Possible pleural effusion:
“There is reduced movement on the affected side, stony dull percussion and reduced breath sounds and vocal resonance over the lower zone. This pattern suggests pleural effusion.”
Never claim a finding you have not actually examined. If uncertain, describe the observed finding rather than jumping to a diagnosis.
8. Red flags during examination
Urgently escalate severe respiratory distress, cyanosis, altered consciousness, exhaustion, low oxygen saturation, stridor, haemodynamic instability or suspected tension pneumothorax. Record respiratory rate and oxygen saturation early. In an acutely ill patient, do not delay stabilisation to finish the sequence.
9. Quick memory guide
- Respiratory exam = IPPA.
- Normal lung percussion = resonant.
- Consolidation = dull percussion, often bronchial breathing and increased voice transmission.
- Pleural effusion = stony dull percussion, reduced breath sounds and reduced voice transmission.
- Pneumothorax = hyper-resonance and reduced breath sounds; tension physiology is an emergency.
- Compare both sides and examine the back and lateral chest, not only the front.
Further reading
- NCBI Bookshelf: Chest examination
- Merck Manual Professional: Evaluation of the patient with pulmonary symptoms
- K2 International: Chest assessment illustration
Next: Abdominal Examination, Ascites and Liver Signs.
10. Extra respiratory examination details
Vocal resonance and the “voice tests”
After listening to ordinary breath sounds, you may compare voice transmission if the findings are unclear:
- Vocal resonance: ask the patient to say “ninety-nine” while listening over matching areas.
- Bronchophony: spoken words sound abnormally clear.
- Whispering pectoriloquy: whispered words are unusually distinct.
- Egophony: an “ee” sound takes on an “ay”-like quality.
These can support consolidation or occur near the upper border of pleural fluid; they must be interpreted with percussion, breath sounds and imaging.
Breath sounds: the practical answer
When asked “What did you hear?”, report air entry first, then the sound type, then added sounds and location. For example: “Air entry is equal bilaterally, with vesicular breath sounds and no added sounds.” Or: “Air entry is reduced at the right base, with stony dull percussion and reduced vocal resonance; this pattern suggests a pleural effusion.”
Additional signs to recognise
- Kussmaul breathing is deep, laboured breathing often associated with severe metabolic acidosis; it is not a specific lung diagnosis.
- Cheyne–Stokes respiration is cyclic waxing and waning depth with periods of apnoea and may occur in heart failure or neurological disease.
- Central cyanosis is best assessed at the tongue/oral mucosa; peripheral cyanosis can affect extremities and may reflect poor perfusion or cold.
- Clubbing is assessed by nail-bed angle and the Schamroth window, but it is not specific to one disease.
- Tracheal deviation and severe acute dyspnoea require prompt clinical interpretation; suspected tension pneumothorax is an emergency.
11. The first 60 seconds at the bedside: how to start
This opening sequence applies to most adult clinical examinations. Follow your school's checklist if it differs.
- Prepare: check the task, gather a stethoscope, watch/clock and other required equipment; clean your hands.
- Introduce yourself: “Good morning. My name is ___. I am a medical student.”
- Identify the patient: confirm their name and another identifier according to ward policy.
- Explain and consent: “I have been asked to examine your breathing and chest. This will involve looking, feeling, tapping and listening to your chest. Is that alright?”
- Privacy and comfort: ask about pain, obtain a chaperone if indicated, expose the chest only as needed, and keep the patient warm and covered elsewhere.
- Position: usually sitting upright for a respiratory examination. Examine the front, sides and back.
- Look before touching: assess the patient from the end of the bed and check observations, especially respiratory rate and oxygen saturation.
If the patient looks acutely unwell, assess airway, breathing and circulation, call for help and treat urgent problems before completing a routine OSCE sequence.
12. What to inspect on the hands, nails, face and mouth
A respiratory examination often begins with general inspection and the hands, then the face and neck. These signs are clues; none should be interpreted in isolation.
Hands and nails
- Clubbing: bulbous fingertips, increased nail curvature and loss of the normal nail-bed angle; may occur with lung cancer, bronchiectasis, lung abscess or interstitial lung disease, among other causes. It is not typical of uncomplicated COPD.
- Peripheral cyanosis: bluish fingers may reflect poor peripheral perfusion or cold; check the overall patient and central sites.
- Nicotine staining: may suggest smoking exposure but does not prove current smoking.
- Asterixis (flapping tremor): with arms extended and wrists dorsiflexed, brief lapses of posture may occur in hypercapnia, hepatic encephalopathy, uraemia or other metabolic states.
- Fine tremor, warm hands or sweating: may be relevant to medication effects, anxiety or systemic illness; interpret in context.
- Pulse: assess rate and rhythm if included in the station.
Face, lips and mouth
- Central cyanosis: inspect the tongue and oral mucosa, not just the lips. Its absence does not exclude hypoxaemia; use pulse oximetry and the clinical picture.
- Pallor: inspect the conjunctivae and oral mucosa for possible anaemia.
- Pursed-lip breathing: can be seen in obstructive lung disease.
- Horner syndrome: ptosis and a small pupil on one side may be relevant in selected apical lung lesions, but requires proper assessment.
- Mouth and voice: note oral hygiene, sputum if present, ability to speak full sentences, hoarseness and signs of inhaled-steroid use such as oral candidiasis when relevant.
- Neck: assess tracheal position, cervical/supraclavicular lymph nodes and JVP where indicated.
Hair and general appearance
Hair changes are not a core diagnostic test for respiratory disease. Note cachexia, muscle wasting, nutritional state and general hygiene/appearance where relevant. Do not spend time listing incidental hair findings while missing distress, respiratory rate, oxygen saturation or chest movement.
13. Exactly what to do in a complete respiratory OSCE
After the opening and general inspection:
- Inspect respiratory effort, rate, chest shape, symmetry, scars, drains and devices.
- Palpate tracheal position, chest expansion and tactile vocal fremitus where taught.
- Percuss comparable areas on both sides, moving systematically from apices to bases and avoiding bone/scapula where possible.
- Auscultate matching areas on both sides, including the posterior and lateral chest. Ask the patient to breathe through an open mouth a little deeper than usual; pause if dizzy.
- Compare side-to-side at the same level. Do not listen only to the anterior chest. Posterior and lower-lateral lung fields contain substantial lung tissue and may reveal basal disease or effusion.
- Complete as appropriate: vocal resonance, oxygen saturation, peak flow or other targeted tests only when relevant and within the station's instructions.
- Thank the patient, help them cover and reposition, clean hands, and report findings.
A safe normal summary is: “The patient is comfortable at rest. Respiratory rate is ___ per minute and oxygen saturation is ___ on ___. The trachea is central, chest expansion is symmetrical, percussion is resonant bilaterally, and vesicular breath sounds with equal air entry are heard throughout, with no added sounds.” Fill blanks only with measured findings and do not claim you examined a region you did not examine.